Writer Workflow Guide
Restructuring the Codex
We are currently moving articles around and changing the general structure of the Codex. Please come back later if you get lost!Some parts of this workflow use features that are only available to the Guild, including Manuscripts, our novel writing software, which is available to Masters of the Guild and above. Consider supporting World Anvil if you are interested in these (and many other) features.
Prepare your world
1. Create an account
The first step to use World Anvil is to create a free account (although you will have to subscribe to use some of our features). Simply click the create account button that you will find in the top right corner of any World Anvil page, including this one.You will be prompted to type in your email and to choose a username and a password. After creating the account, you will be walked through an on-boarding process where you will be able to choose different account settings. The default settings will already have all the features you need enabled.
2. Creating your world
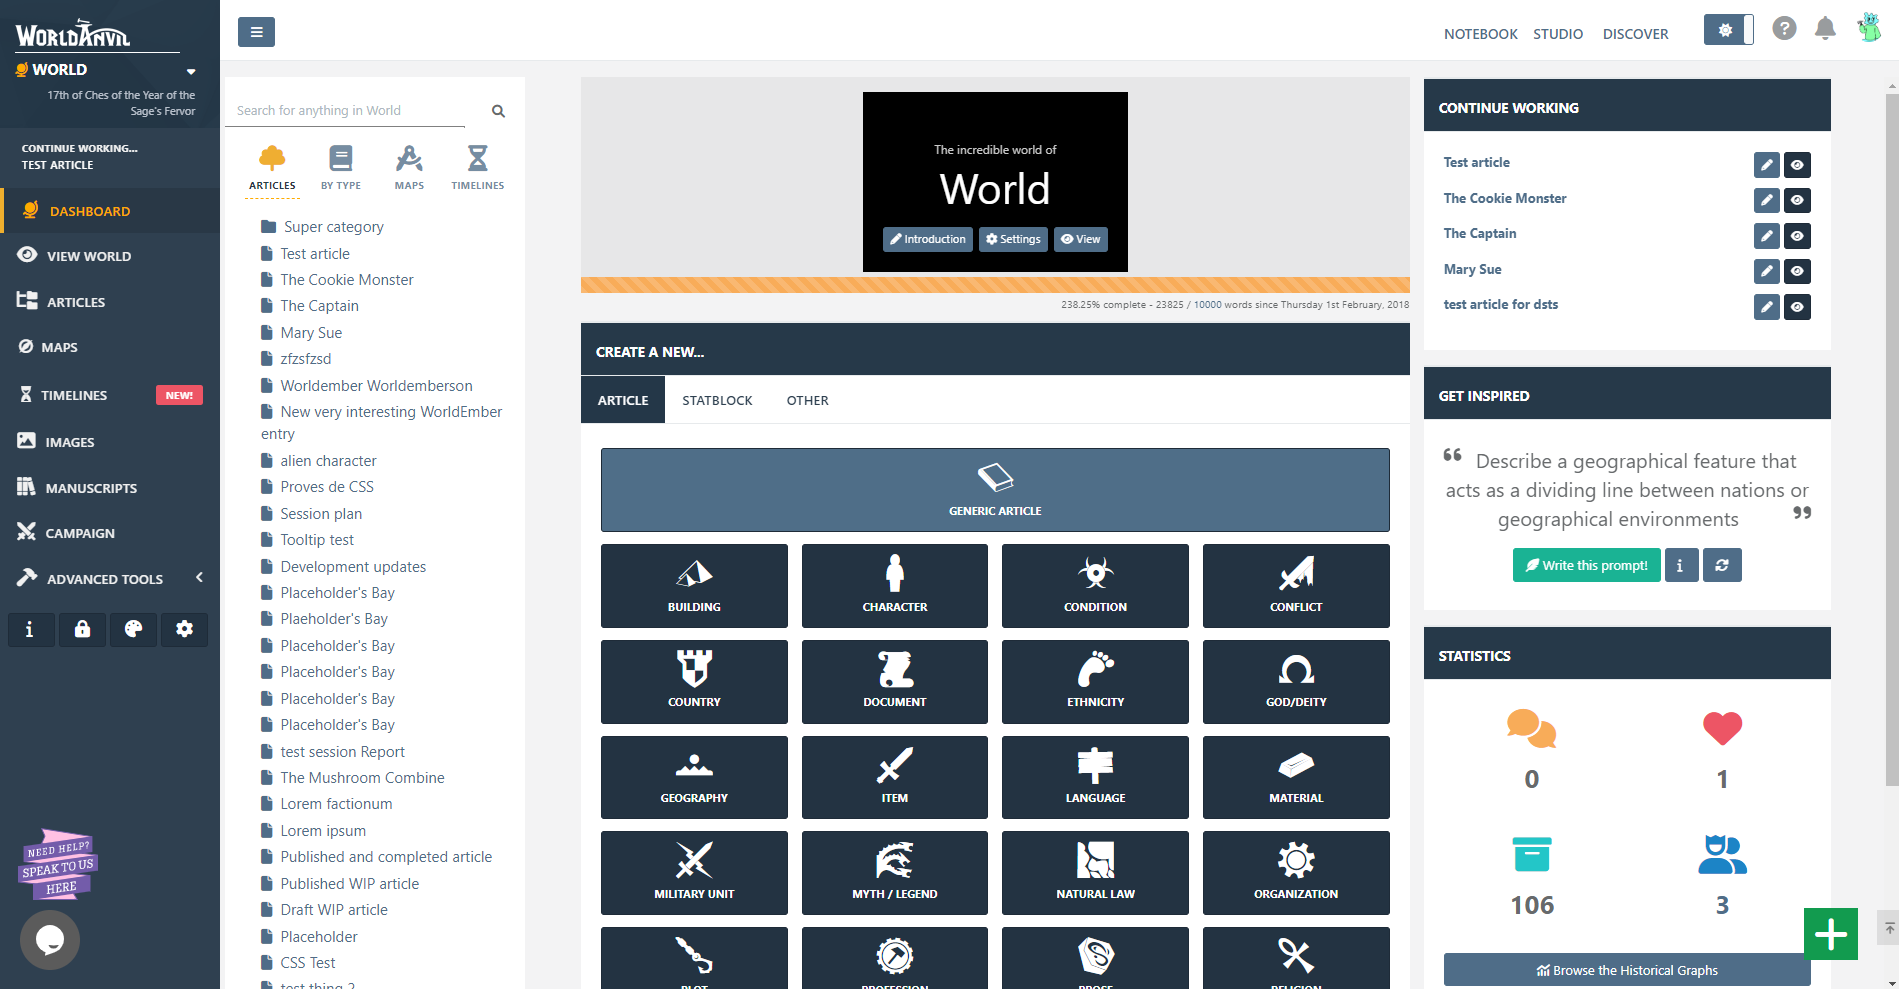
Before we create our first story, we need a world for the story to take place in. During the on-boarding process you will be asked to choose between creating a world or a character. Pick the world option and fill in the name of the world and the basic details:You will be able to change these details later, so don't be afraid of mistakes or typos. After you click the Save and Proceed button, you will be redirected to the world Dashboard, which looks like this:
Most of this page is dedicated to the world search and the create menu. In World Anvil, you organize articles in categories, but there are different types of articles. These different types are called templates, and each one has different features for each kind of story element. For example, the character template has family trees, while the organization template has diplomacy webs. To create your first story element, simply click on the template for the element you want to write about.
Note that you don't need to fill in every field in the template —they are just there for inspiration. If they are too much for you, just write everything in the main text field at the top. You can read more about editing articles in the Guide to article editing.
You might also be interested in other features, such as the interactive maps, organization charts, and family trees.
3. Plotting and pantsing
Before writing the story itself, it's a good idea to plan for it, both as a plotter and as a pantser.If you are a plotter, find the Plot template in the world dashboard. This template has various optional fields that will help you plan your story. If you are writing a long-form story, you might want to create several plot articles, one for each part. You can then put them all inside the general story plot using the parent plot box in the template (click the show template specific prompts button, then the Generic tab).
On the other hand, pantsers might want to set up all of their planned characters first. Just use the character template to create them all and the Relationships tab in the character editing page to create parent-child relations —this will let you generate a dynamic family tree. If you are interested in that, take a look at the Guide to Family Trees.
Let's get writing!
1. Create your manuscript
With your world ready, it's time to start writing your story. Go to the Manuscripts page from the left sidebar, then click the Create a new manuscript button. This is how the new Manuscript will look after creation:
Use the left column to organize your story into chapters and scenes. You can only write in scenes, so even if you want to write all of your scenes in a single page, you need at least one scene per chapter.
To change a scene location, simply use the left panel to drag and drop it in its new chapter. You can also reorder whole chapters. If a scene or chapter is no longer relevant, you can drop it in the Bin folder (which won't permanently delete it —it's more similar to an archive).
2. Organizing your Manuscript
There are several tools to help with organization and structure. While you are editing a scene, use the right panel to set tags and labels. The label will color the scene in the left panel, while tags will be useful when you click on a chapter to review its structure:You can also set the POV character and related world content (characters, locations, etc.), as well as the scene type and importance. These details, including the tags and labels, are only visible to you —anyone viewing the Manuscript when you publish it will not be able to see them. By default, labels have the name of its color, but you can customize them in the manuscript's configuration ("Labels" tab).
Finally, you can also upload a book cover and add the title and backcover summary if you already have it. To do that, click the name of the manuscript in the left sidebar to fill these details. The book cover's dimensions are 500x700px (A5, international standard for fiction paperback).
3. Integration with your world
Manuscripts is tightly integrated with your World Anvil world. While writing, you can use the Manuscripts' search bar at the top to look up any article on your world. Click the article you want to open to display it in the same page. This is great to quickly reference and update your plot outline or a relevant character without having to open a new tab. And, if you need to, click the quick edit button to edit the article without leaving your story:4. Editing
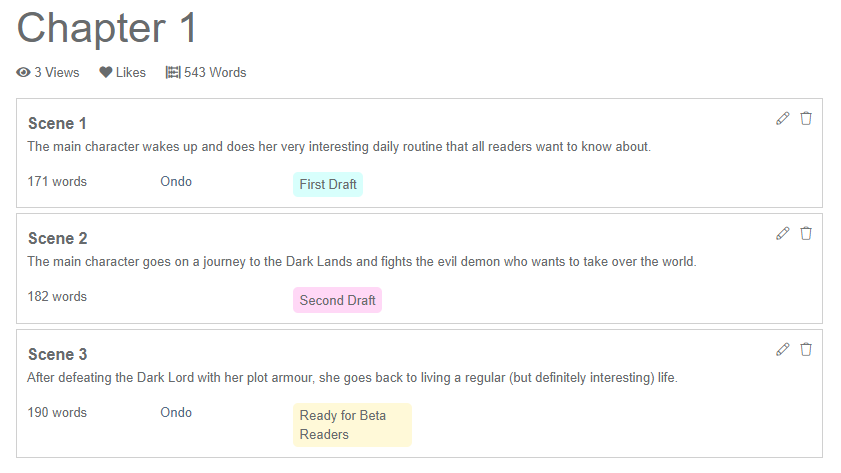
Manuscripts has a variety of features that will help you in the editing process of your story. Start by labeling each scene with a color that represents something important to your editing process. For example, red could mean "needs heavy editing", while green could be "editing completed". These colors will be displayed in the left sidebar, as well as in the scene overview. To access this overview, click on a chapter:You can also use Manuscripts to manage your beta readers. To do this, make sure the Manuscript is set to private in the access tab of the Manuscript settings (remember that you access the settings page by clicking the name of the Nanuscript in the left sidebar). Then, publish each chapter using the button in each chapter's right sidebar.
Even if your Manuscript is published, no one will be able to read it if it's set to private. However, you can use subscriber groups for your beta readers so that you can add them as an exception. More information on subscribers in the Guide to Subscribers.
5. Publish
After you finish your manuscript, you can either publish it on World Anvil or export it.5.1. Exporting the Manuscript
You can publish the Manuscript digitally on World Anvil itself or, alternatively, export it as an HTML file if you want to publish it in another format. To export it, click the name of the Manuscript in the left sidebar. Then, find the tab with the Export icon in the right sidebar. Clicking the Export in HTML button will open the full Manuscript in a new tab, in a basic HTML formatting. You can then copy-paste it in a document or print (both physically or as a PDF).Export options in other common e-book formats are coming soon.
5.2 Publishing on World Anvil
If you want to publish the Manuscript on World Anvil, go to the first chapter and go to the the Settings tab in the right sidebar. Make sure the Manuscript and the chapter are set to public, and then click the green button Publish Chapter & Manuscript. All scenes and images inside this chapter will be published and all of your followers will get a notification. This won't publish any other chapters, but it's an irreversible action, so make sure you have finished writing it!You can then publish the rest of chapters, one by one, using the same method. If you want to offer only some chapters as a preview and keep the rest private for your supporters, publish all chapters but make sure that the exclusive ones are set to Private. Then, use subscriber groups to let your readers in the exclusive chapters (more information in the Guide to Subscribers).
After being published, your Manuscript will be listed in the Community page. Make sure you have selected the genre(s) and language of your story to make it easier to find. From the Manuscript's page, your readers will be able to interact with you by following your work, liking or bookmarking chapters, and leaving comments. You will get notifications every time someone leaves you a like or a comment. If you want to see how a published Manuscript looks, go the community page and browse some of them!
That's it!
You have created your world, planned your plot or characters, and written and edited your story. By now, you should have a published or exported Manuscript or, at least, know how you can do it. For more detailed information about Manuscripts, check out the Guide to Manuscripts.If you have any questions, leave a comment in this page or join our Discord server and ask in the #help channel.


Hello :) I have one question that I'm really curious about. Do fantasy writers need World Anvil's permission to publish a novel that includes a map made with the website's map maker?
Hello Markus, World Anvil is not a map making software. If you mean or interactive map editor, no you need no permission to do so.
World Anvil Founder & Chief Grease Monkey
Twitter | World Anvil Changelog
“No act of kindness, no matter how small, is ever wasted.” - Aesop